

Everyone knows this web server as “Apache”. In this post we will see how to use it basically.
Introduction
Apache HTTP Server is an HTTP server that can be used for many things. Its most famous use is to host web pages. Here we are going to configure it to be able to serve a Webpage.
Installation
Windows
We access the page
https://httpd.apache.org/docs/current/platform/windows.html
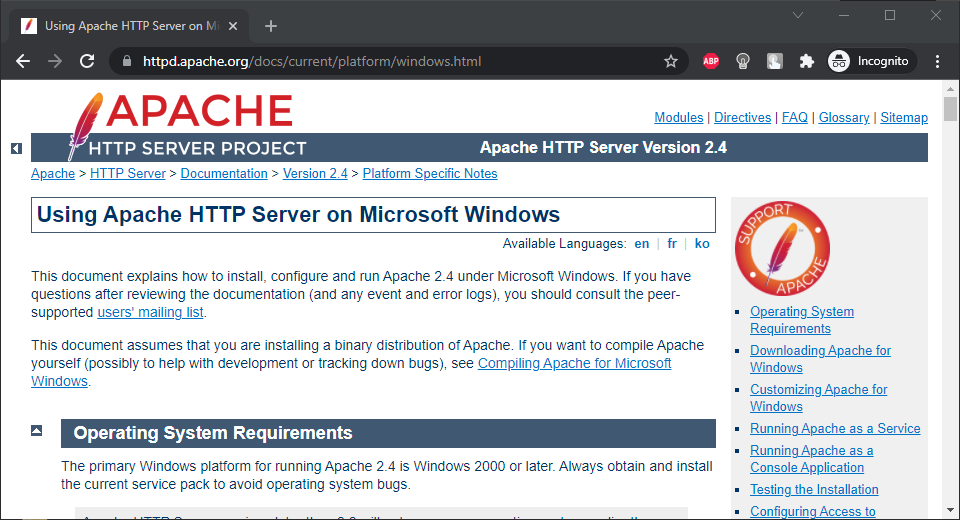
In the “Downloading Apache for Windows” section we click on XAMPP.
This loads the XAMPP Webpage (which is a mix that contains Apache HTTP Server and other applications).
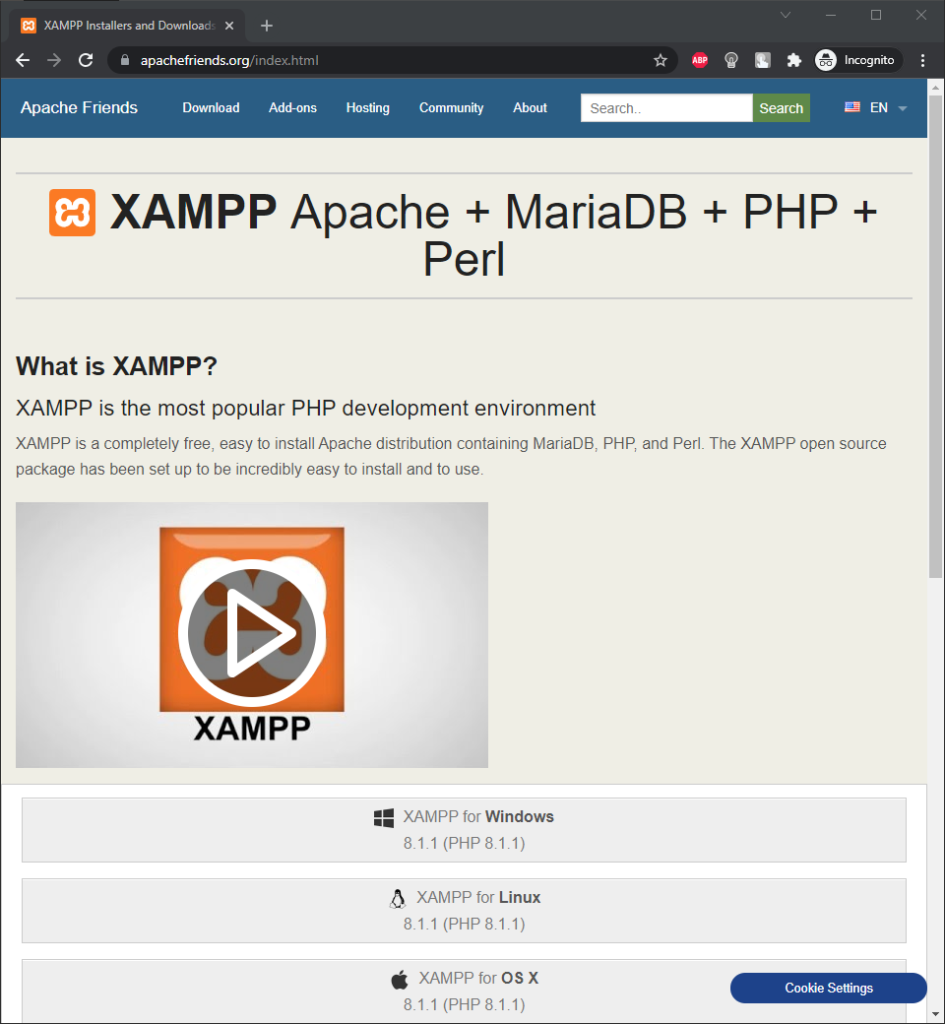
Pulsamos en “XAMPP for Windows”.
This way we download an executable like xampp-windows-x64-8.1.1-1-VS16-installer.exe.
We execute it and leave all the installation options by default.
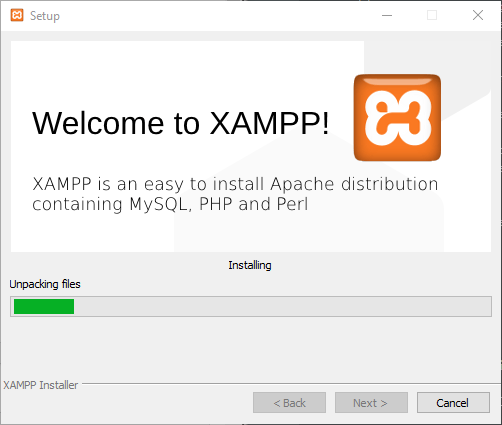
And with this we will have Apache HTTP Server installed on Windows.
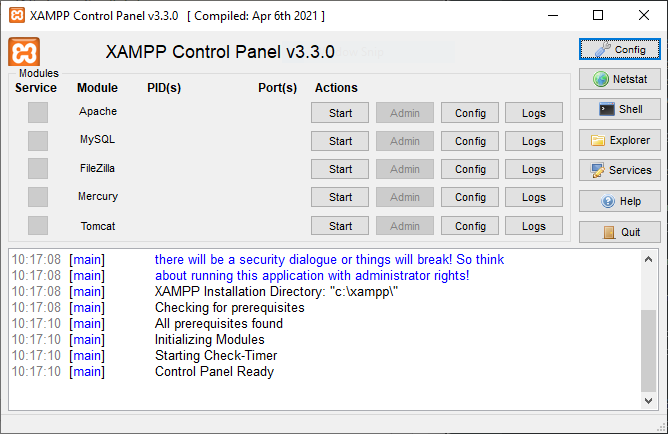
XAMPP starts automatically.
We start the server by clicking on the Start button to the right of the Apache text.
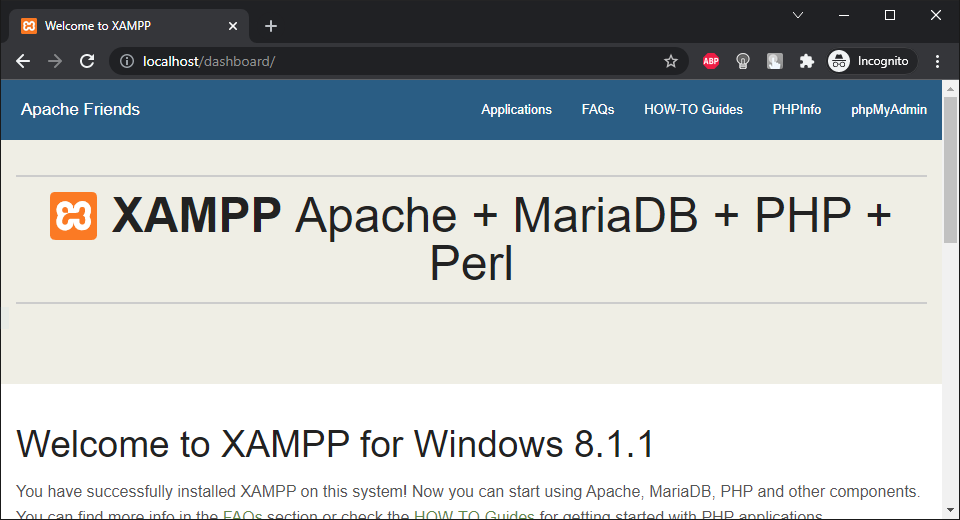
To check that Apache has been installed, we access the localhost URL with our browser, and we will see the XAMPP home page (which contains Apache).
Linux
On Ubuntu we can install it with the following command:
apt install -y apache2
We start the server using the command:
service apache2 start
And with this we will have Apache HTTP Server installed and started on Linux.
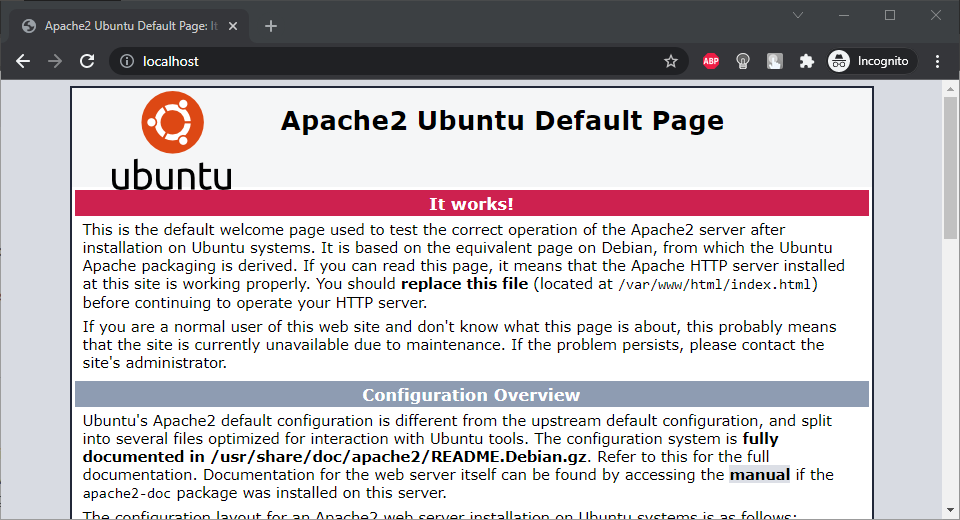
To check that it is correctly started, we access the URL
And we will see the Apache HTTP Server home page.
Configuration
Windows
We go to C:\xampp\apache\conf.
We edit the httpd.conf file.
We go to the line with the text
DocumentRoot "C:/xampp/htdocs"
That will be the folder where we should leave our index.html file (there is a default page right now).
Linux
We go to /etc/apache2/sites-enables.
We edit the 000-default.conf file.
ere we have to review the route where our website will be. By default it is
DocumentRoot /var/www/html
Testing
We go to that route (disk path of the Web page).
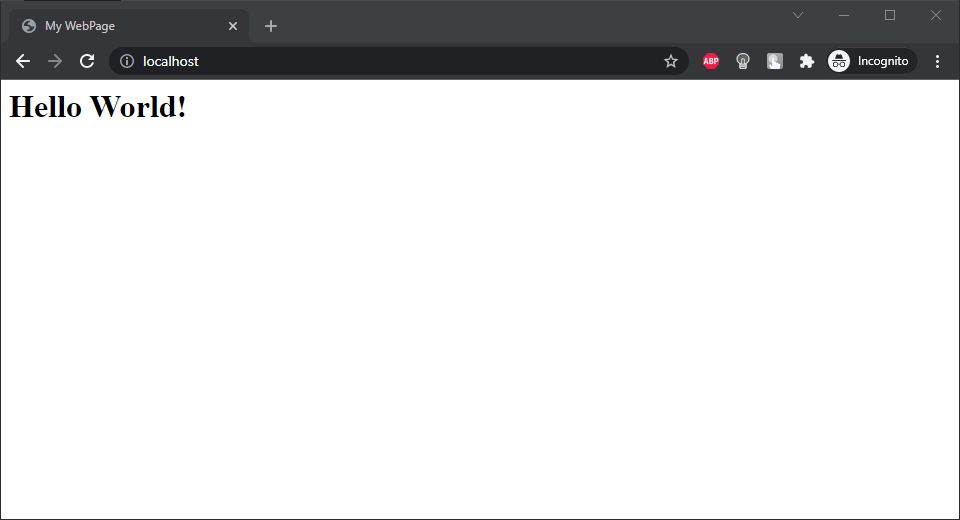
We create an HTML file with the following content:
<html>
  <head>
    <title>My WebPage</title>
  </head>
  <body>
    <h1>Hello World!</h1>
  </body>
</html>
We restart the server:
Windows
In the XAMPP control panel, we click on Stop and then Start.
Linux
We introduce:
service apache2 restart
With a Web browser, we access:
And the result that we will see will be the Webpage that we have created.
So, what do you think ?